How to keep a cat happy with automatic cleaning litter box

Happy cat

When raising a cat in your house, you always want it to be as happy as possible and there are many ways to do so. Among them, giving those little kitties a suitable litter box seems to be the best bet. And in this article, we will tell you why, with some of the most notable benefits that the best automatic cat litter box can offer, or at least the most suitable one for your budget and your pet. Here you go: obeymycat.com/top-rated-automatic-cat-litter-box

1/ Clean every time

Your cat will be much more pleased every time iClean every time t has to “take care of its business”. That is because you don’t have to scoop the repulsive kitten dumps manually anymore as the self-cleaning function will handle the dirty work for you. You don’t have to get your hands dirty ever again. Plus, changing the litter is quite easy, I’d say. The whole process takes only about 1 minute. First, take the litter box out, slide out the tray filled with litter, put the new tray in and put the box back to its original place. Because of all that, the litter box will be clean every time your cat needs it.

2/ Odor control

If you feel repulsive by your own feces, then you would know that your cat will feel the same. Nevertheless, with the great odor control property, it will be more likely to “conduct its business” here. Your cat’s waste will be put in a closed container which, as a result, will keep all the stinky smell trapped inside.

3/ More money for your cat

Waste in a conventional litter box is collected at the end of the day. You might think that is OK but during the course of the day, the solid waste inside will get broken down every time your pet “gets to work”. When you come to scoop it out manually, there will still be a tiny amount stuck inside. As days go by, these particles start to build up and the same is true for the smell. If the litter box reaches this stage, many people will throw the tray away and just buy a new one.

With the self-cleaning litter box, it will dispose thoroughly the solid waste, leaving only the clean litters behind. This will save you time and money going to the store, resulting in more “green” to spend on your kitty.

4/ Automatic feeder

automatic feederWith the traditional litter box, you will have to take care of your cat’s waste every day. If you think ten minutes a day is nothing, try adding them up over the course of a month, you could’ve spent much more precious time with your feline friends. With an automatic litter box, you can leave the box for a whole week if you have one cat and maybe 3 or 4 days if you have more than one. This will give you more time to play with your pets, which makes them happy and in turns, makes you happy as well.

5/ Multiple cats are happy

If you have more than one cat in the house, cleaning the litter box every time one cat finishes using it is a bit too much to ask if you are busy with your current job. If somehow you cannot manage to clean your cats’ restroom every time, the next cat will not be pleased with its W.C and the ones after that will detest it and find somewhere else for that. With the “clean every time” function, you will have less work and your cats will be in a much happier mood “carrying out their duty”.

Posted in: Home tool

How to properly set up a fish tank for beginners

Fish tank

For those who don’t know, I’ve always been a fish maniac during my entire life. It all started when I was a child, I watched a TV show on the Discovery channel. I was immediately attracted by the awesomeness of the ocean. So I told myself that I’ll create an oceanic world of my own.

Set up fish tank
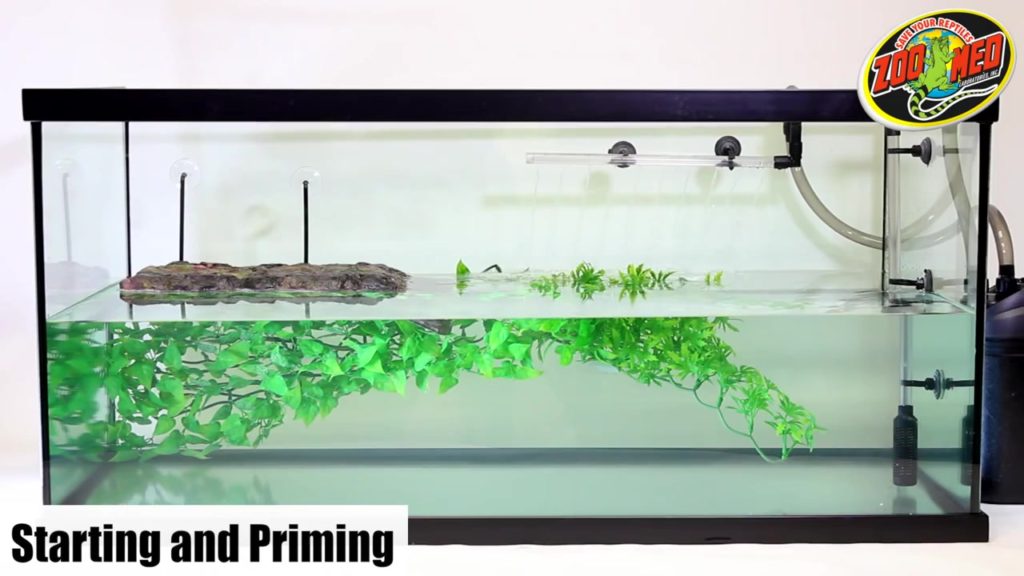
For those who’re still new to this, don’t feel discouraged setting up your own fish tank. It’s really simple, I’ll show you.

Preparation

First, you will need a fish tank, and by that, I mean a large one. Not the kind that you could put on your desk. Clean the inside of the tank with some warm water and clean towel. After that, prepare some stuff for the decoration. It could be some sand, some gravel, some shiny rock, and plants.Preparation

You also need to clean them with water. Remember only use water for this, don’t apply any detergent or soap because they’re toxic for your fish. For the plants, you could use some plastic ones since they’re cheap and easy to use. But I prefer using live aquatic ones because they bring great benefits for your tank. These plant could help purify the tank as well as adding oxygen to the water. But they’re not easy to take care though.

Decoration

Start by putting the sand onto the tank bottom surface, make sure you spread them evenly. Then plant the plants in the sand, do this as deep as possible so your plant could stay firm. Spread the gravel and rock on the sand surface, add a little more at the roots of the plants to stabilize their position. After that, pour the water in the tank, start from the bottom to the near top of your fish tank. Remember to leave some spare space between the water and the cover. This will allow your fish to surf up to the surface and grab some air. There is also an option of making a background for your aquarium. It could be a scenery of a forest, or under the deep sea. I think it’ll look very cool so you should try it some time. Also, you can decorate the outside of your fish tank with some sticker. It’ll up to your style to choose that sticker.

Equipment

Equipment

It’s not done when you finish filling water in the tank. You need to make sure the water environment is suitable for the fish to live. What we’ll need are a water filter and air pumper. You can find the best canister filter here. This two equipment will help clean the water and adding more oxygen to it. Additionally, I often use a pH meter and a temperature meter to make sure the water is good and the environment is stabilized. A little remind when choosing your water filter, you should choose a filter that comes with both biologic and mechanic filter. The mechanic one will remove all the dirt on your tank and the biologic will get rid of the ammonia that was formed from the fish urine. It’s very toxic so be sure yours can do it.

Preservation

Remember to change the water frequently. Even though you’ve got all these devices to do the work for you, your aquarium will still get dirty over time. This dirt can’t just disappear so you’ll need to get rid of them by changing the water. Also clean the inside of your fish tank, not only the water. A lot of dirt got stuck in the tank and they won’t go away until you do something with them.

Posted in: Home tool

Is 123movies safe

Is it safe

Watching movies has always been the most common types of entertainment. In the old days, we’ll have to go to the cinema or theater to watch movies. But now, movies can be watched from almost anywhere as long as you have a decent internet connection. Web sites that allow its users to stream movies from it are coming up one by one. Some of the most well-known names are Amazon, Netflix, or Hunu. And of course, users must pay for the contents. But there’re many websites that allow user to freely streaming movies from it without charging a single penny.

123Movies

credit: https://freesiteslike.com

The most famous website in this category is 123movies and since it’s free to use, most users often question: is it safe to watch movies on it? This article bellow will answer all your question about the benefit and risk of watching movies here.

Is it legal?

Is it legal

credit: http://bestforkodi.com

For this matter, there has been many discussion both online and offline whether the site is illegal or legal. In my opinion, it’s sort of legal since it doesn’t have any movies on its server. All movie links are from other websites (dailymotion, filefactory, crunchyroll.com, veoh.com, peteava.ro, 2shared.com, 4shared.com, uploaded.net, youku.com, youtube.com and others) so technically it’s is legal. The website just redirects users to other movie hosts, it doesnt directly host and distribute the contents.

Is it safe?

Is it safe

credit: twitter.com

All movies on the site are free to watch so you may wonder how the developer can make money from it. The answer is ads, lots of ads. If you’re coming here without an ad block on your browser, you’d definitely be spammed by ads. And sometimes, these ads are dangerous since they contain malware or virus program. So in order to watch movies on the sites, be sure to equip a strong internet firewall, malware and virus detector. And if you are not using any ad block software, remember not to click on any suspicious links. If the link pops up on itself, immediately close the tabs. And always visit the site in incognito mode.

Watching free movies on 123movies is safe but it could get dangerous sometimes. So users should always be careful and beware. But who could resist the temptation of being watching all types of movies online for free? If youre still worried about the security, you should try 123movies, click to visit now.

Posted in: Movies Zone

How to do some simple house repair jobs?

Toilet repair

Your house is what probably cost you the most, so it makes sense that you should take care of it. While it is advisable that you should call a professional when something breaks or functions improperly, you can fix many of them yourselves. While most of these require little to no experience at all, it is always a good idea to do some quick research beforehand. This is especially true if you are dealing with electrical stuff. Anyway here is our list of the most common fix that you can do it yourselves.

Simple house repaire

credit: myhomecenters.net

Broken toilet lever

This is an easy one. If pushing or pressing the lever doesn’t work, you can just open the tank (the area where the water is held) and connect the chain again. In more serious case, the handle might be worn out due to external elements or there are some broken pieces. In that case, you can buy the replacement parts on the market and ask the seller how to replace. They will be glad to help you.

Toilet repair

credit: family handyman.com

Unclog the toilet

You will need either a toilet plunger or a toilet auger for this. Put the plunger to the hole and flush water to submerge it. Next, perform some downward thrusts, like 8 or 10 times. In simple case, the water should flow freely after that. If not, it’s time to use the auger.

This tool will cost more than a plunger but it works much better for serious case as well. Put the auger into the toilet until you feel that you have reached the clogged part then pull it out. It’s simple as that.

Pipe leakage

To fix this, you need to first cut off the water to the pipe, either by using a valve near it or somewhere in the basement. Once that’s done, put a bucket or something similar below the pipe. Start unscrewing the compression nut and rinse out the P trap if necessary. Then just replace whatever you need and screw everything back again.

Replace a light switch

Replace light switches

credit: icastle.com

You may be tempted to call a professional to do this type of work for fear of getting electrocuted or even worse when dealing with electricity. However, this is very easy and you can do it if you can follow some simple instructions. Firstly, cut off the electricity to avoid any unwanted damage. Then open the cover of the switch using a flathead screwdriver. Next, remove the broken switch and you will see two wires. Disconnect them and attach them to a new switch and put everything back together.

Holes in the wall

These are inevitable but can be easily fixed. For small and simple resulting from hanging a pictures or anything similar, you can do the following. Wipe the area clean and put some spackle into it using a small knife and then let it dry. Once you are done with it, use sandpaper to flatten the surface and apply paint if necessary.

Stuck window

If you haven’t opened your window for a while, then it will make some terrible noise when you try to open it again. For this, you will need some lubricating agent like elbow grease or WD40. Apply it to the stuck area and try move the window gently by using a small blunt knife to get the edges to open. Once you get it moving, remember to wipe the dirt thoroughly.

That was our take on some of the most common house repair jobs. If this is not enough for you, then please click here to see more information on this topic. You won’t be disappointed.

Posted in: Home tool

Guidance for installation of solar power system for the household

For new homes

1. The solar power system for the life

Solar power is becoming more popular and cheaper. Nowadays, there are many families who want to combine solar power system with electricity grid to be able to use for daily needs. There are many households that use solar electricity as the main source of electricity, and the grid is a back-up source when solar power is no longer sufficient to supply the load. But many families just want to install solar power for some small loads in the family to be able to prevent the loss of electricity such as lighting, fans, television. If you want to learn about the best battery chargers, I suggest the schumacher battery chargers.

Solar power system

credit: alibaba.com

In this article, we will show you how to install a solar-powered grid electricity system for households that are building a home or intend to build new homes and households that have an electrical system. Stable that want to install more solar power system. For grid-connected solar power systems simply do not care about your homes electrical system. The method of calculating the design of solar power systems can be found in in-depth articles.

2. For new homes

For households that are building a house or planning to build a new home, the design and installation of solar power systems will be simple. First of all, you list all the loads that need to use solar power. If you want all the loads in the house to use solar energy, no need to pay attention to the installation of electrical systems in the home. You only need a 2-way switch to isolate the two power sources as shown below. If possible, you can invest in an electrical switchboard that can automatically switch power supplies.

For new homes

credit: http://www.terrasolenergies.com

If you just want to power some of the lights and sockets, then you should install these roads independently to be able to supply solar power to these roads without affecting other equipment. In this case, you also invest in a 2-way switchgear or cabinet to separate the branch to use the energy of the surface.

3. For home has a stable power system

For households that have a stable grid system, when they want to install solar power, it is likely to be more complicated when it comes to calculating whether to cut off individual solar power loads. Pull more power lines

Posted in: Electronic

How to choose a baby beach tent

Considerations
How to choose a baby beach tent

credit: fractuslearning.com

Imagine having your kids on holidays with you, I must say it is such a wonderful family activity. Not to mention, this kind of activity could create a harmony atmosphere in the family and reduce the space between family members. And what could be better than a relaxing holiday on the sunny beach? You can play volleyball with your kids, running on the shore, or chilling under a tent. But normal tents are only for adults and they seem a little big for baby and kids. That is why you’re going to need kid tent. So how can you choose tents for your kid? It’s not difficult at all. And I’m pretty sure that after reading my post you’ll all find your own answer. Now, let’s find out how to choose the best baby beach tent.

What is a baby beach tent?

What is a baby beach tent

credit: pinterest.com

This convenient item gives your baby and kid a little space to rest, relax, and sleep after playing under the boiling sun on the beach. It looks like an adult tent but a lot smaller and easier to fold, pack, and carry. And it can go beyond a simple tent, you can use it for camping in the back yard, in your kid room, or even on their bed. It’ll be so much fun and is a great way to strengthen the bonds between parent and children.

Considerations when buying a beach tent:

The product that you’re about to buy should come with a full certified ultraviolet protection. It’ll be pointless to buy a beach tent that is only used for shading. Because the sun often very bright and hot on the beach and you’ll need a proper protection for the baby under the burning sun.

It should come with sand pockets or stakes on the four corners of the tent. You should really consider this unless you want your kid tent to be blown away by the sea wind.

Considerations

credti: ebay.com

And how large you want your tent to be? It should be big and steady enough to handle all the kids but still flexible to fold and carry around. You probably don’t want to disappoint the children with a tiny tent, right?

Or if you think a baby beach tent isn’t going to be big enough, you should really consider buying a full-sized family tent. It’d definitely be bigger and harder to carry around and your kids won’t be able to use it in their room. But they’d definitely be a better choice for a family on the beach than a tiny baby tent.

I almost forget, you must check for the tent if it has any ventilation features. It’ll be horrible staying in a small tent without any windows or open-up sides.

Conclusion

Baby beach tent is a great choice for kids at the beach. With just a little research, I’m sure that you could find a good tent for your baby. Enjoy your vacation on the sunny beach. See you in my other posts.

Posted in: Mother Zone

Earbuds Cleaning Guide

The earbuds are a versatile companion on your long trip to your destination. They are also a great source of inspiration at the gym and a loyal friend for the introverts. They deserve proper maintenance in order to extend their lifespan and protect yourself from the risk of infection. For the best earbuds under 50, we should clean them more carefully and regularly because the housing is not made from anti-bacterial materials.

Preparation

Some of the necessary tools are:

  • A gentle cleaner such as a mixture of tepid water and a soap without grease. You should see a lot of advertisement about the heavy-duty earbud cleaners, however, there’s no need to splurge on this specialized liquid if your earphones are under 50.
  • A soft piece of cloth
  • A dry new toothbrush
  • Some clean, thin toothpicks
  • Hydrogen Peroxide. This compound can be easily found in any first aid kit.
  • Medical cotton wool
  • Alcohol
  • Mineral oil
  • Some cotton swabs

Cleaning process

Step 1: Check if your earbuds have any removable silicon covers, if they do, sanitize them thoroughly

Some of the famous manufacturers like Apple, Samsung, Panasonic integrate removable silicon covers into their products in order to facilitate the cleaning process.

If they do, just take them off gently and wash them in the mixture of tepid water and dish soap without grease. Alternatively, you can use baby detergent.

Make sure the covers are free from earwax and sweat.

Dry the silicon covers before putting them on the in-ear headphones.

Step 2: If they don’t have silicon covers, then clean the earphones carefully with alcohol-soaked moist medical cotton wools.

Never soak your earphones inside water to disinfect them because water will ruin the inner digital structure.

Alcohol will kill all the dangerous germs and fungi then evaporate completely.

To speed up the evaporation, you can dry the in-ear headphones with a dry soft cloth.

Step 3: Use toothpick to remove all the cerumen stick to the speaker holes

This step requires a high level of cautious because the toothpick is capable of poking the wax farther into your earbuds.

Step 4: Hydrogen Peroxide 3% to completely get rid of the earwax

This substance is used to guard your skin against the risk of infection. You will easily find it in any first aid kit. It can be applied on the minor cuts, scrapes, and burns on your skin.

Thanks to the abilities above, this substance is good for removing earwax from your headphone

Use a clean, dry toothbrush with a few drops of hydrogen peroxide % to softly brush the cerumen away.

After 5 minutes, clean the earbuds with an alcohol-soaked medical cotton wool

Step 5: Mineral oil-soaked cotton swab finishes the job

The earwax will be dissolved by the mineral oil soaked cotton swab. Just lightly dab the small tool at the cerumen. When the wax gets softer, get rid of them by the alcohol-soaked medical cotton wool.

Tips:

Some of the suppliers will offer you a cleaning kit as a bonus. These necessary tools will make this job much easier.

Posted in: Electronic